Thursday, May 11, 2023

OIC - Convert CSV file data to JSON | Oracle Integration

Usecase: we will poll a csv file using FTP adapter and convert it to json file using FTP adapter configuration.

Highlevel steps:

  1. Create FTP connection.
  2. Create an Scheduled orchestrated integration and call FTP adapter and poll the CSV file.
  3. Drag and drop FTP adapter again and configure to write json file to a directory.
  4. Map the csv file response to write file json data.

CSV file:


Json format:


Detailed steps with screenshots:


XSD - Convert XML payload to XSD Schema online | Sample Employees XML and XSD

We can convert a XML file to XSD online easily. Several free online tools are available in the market.

I have used below URL to convert:

https://www.liquid-technologies.com/online-xml-to-xsd-converter

Suppose you have below employee XML:

<?xml version="1.0" encoding="UTF-8" ?>

<Employees>

   <Employee>

      <FirstName>Sanddy</FirstName>

      <LastName>Das</LastName>

      <Department>IT</Department>

      <Qualification>BTECH</Qualification>

      <Age>35</Age>

   </Employee>

   <Employee>

      <FirstName>Dips</FirstName>

      <LastName>Chak</LastName>

      <Department>IT</Department>

      <Qualification>MCA</Qualification>

      <Age>34</Age>

   </Employee>

   <Employee>

      <FirstName>Rupesh</FirstName>

      <LastName>Sil</LastName>

      <Department>HR</Department>

      <Qualification>MBA</Qualification>

      <Age>42</Age>

   </Employee>

</Employees>


Converted XSD:

<?xml version="1.0" encoding="utf-8"?>
<!-- Created with Liquid Technologies Online Tools 1.0 (https://www.liquid-technologies.com) -->
<xs:schema attributeFormDefault="unqualified" elementFormDefault="qualified" xmlns:xs="http://www.w3.org/2001/XMLSchema">
  <xs:element name="Employees">
    <xs:complexType>
      <xs:sequence>
        <xs:element maxOccurs="unbounded" name="Employee">
          <xs:complexType>
            <xs:sequence>
              <xs:element name="FirstName" type="xs:string" />
              <xs:element name="LastName" type="xs:string" />
              <xs:element name="Department" type="xs:string" />
              <xs:element name="Qualification" type="xs:string" />
              <xs:element name="Age" type="xs:unsignedByte" />
            </xs:sequence>
          </xs:complexType>
        </xs:element>
      </xs:sequence>
    </xs:complexType>
  </xs:element>
</xs:schema>

Tuesday, May 9, 2023

OIC - Oracle Integration Generation 3 New Features

OIC Gen 3 New Features:

  1. Oracle Redwood theme : The Oracle integration user interface reflects the Oracle Redwood look and feel, All screenshots, icons, and termonology has been updated in the Oracle Integration library accordingly.
  2. Shape determines your upgrade window : When you create an instance in the OCI console, you must choose a shape, either Production or Developement. The shape determines when the instance receives monthly and quaterly updates. Instances with a development shape receive updates two weeks before the instances with a production shape. Once you selected the shape, you cant change the shape of an instance.
  3. Real time billing and usage data: Billing happens on the number of actual messgaes consumed , not the configured number of messages packs. On the metrics Explorer page, the new graphs show the number of messgaes that you purchased and that you have used.
  4. Oracle integration Home Page metrics : View the total number of messages, total errors and the number of failed integrations. You can also view existing integrations or create new ones from the home page and view recent activities with their status.
  5. Cut and Paste elements in the integrations canvas : Allow you to cut and paste elements(actions and invokes) in the integration canvas. This enables you to move elements to other places in your integration and eliminates the need to recreate them.
  6. Expandable and Collapsible actions : You can expand and collapse logic actions in the integrations canvas ( for example, a scope, while, for-each, switch and others) to see chile actions and view errors.
  7. Control activity stream data retention during integration activation : During integration activation, you will be prompted to select the tracing level. The level you select determines how long your data is available in the activity stream. Production: 32 days, Audit: 8 days, Debug: ( Not recommended) : 24 hrs.
  8. Activity stream enhancements : To improve performance, message payloads are accessible differently in the activity stream based on their size. Binary payloads can be downloaded from the activity stream.
  9. Instance Id change from Integer to String or alphanumeric.
  10. New mapper functions : 3 new functions introduced. 
    1. Matches
    2. replace
    3. tokenize.
  11. Test mapper enhancements : the test mapper supports the testing of mappings you created with tracking variables and local variables in assign actions.
  12. Mapper function, operator and XSLT statement embedded help.
  13.  While using connectivity agent, basic authentication is not supported in generation 3. To install and use connectivity agent, we need to use OAUTH 2.0 token based authentication in installerprofile.cfg file.
    1. https://soalicious.blogspot.com/2023/10/oic-gen3-connectivity-agent-install.html
  14. Parallel action. Follow my blog.
    1. https://soalicious.blogspot.com/2023/09/oic-gen3-parallel-action.html
  15.  Publish Event action. Follow my blog
    1. https://soalicious.blogspot.com/2023/09/oic-gen3-how-to-publish-and-subscribe.html
  16. RBAC - Resource based access control over projects.
    1. https://soalicious.blogspot.com/2023/09/oic-gen-3-how-to-regulate-access-to.html
  17. CC, BCC added along with to and from in Email notification action.
  18. Read file in segment - set your own file segment size.
    1. https://soalicious.blogspot.com/2023/10/oic-gen3-read-file-in-segment-set-your.html
  19. TBD


Reference:


Tuesday, April 18, 2023

OCI API Gateway route to OCI function and test from Postman

Usecase: API Gateway to route to a function and then test it from POSTMAN.

Highlevel:

  1. Create a hello world java function in OCI.
  2. Create an API Gateway and route it to the function.
  3. Add policy to access to the compartment.
  4. Test the API gateway rest service from postman.
Detailed steps:

Step1: Create a java hello-world function
Navigation >> developer services >> Fuctions >> Applications

Follow my below blog : how to create a function:


Here, I have already created the function.


Step2: create an API gateway and route to function as deployment.

Follow my below blog: How to create API gateway and route.

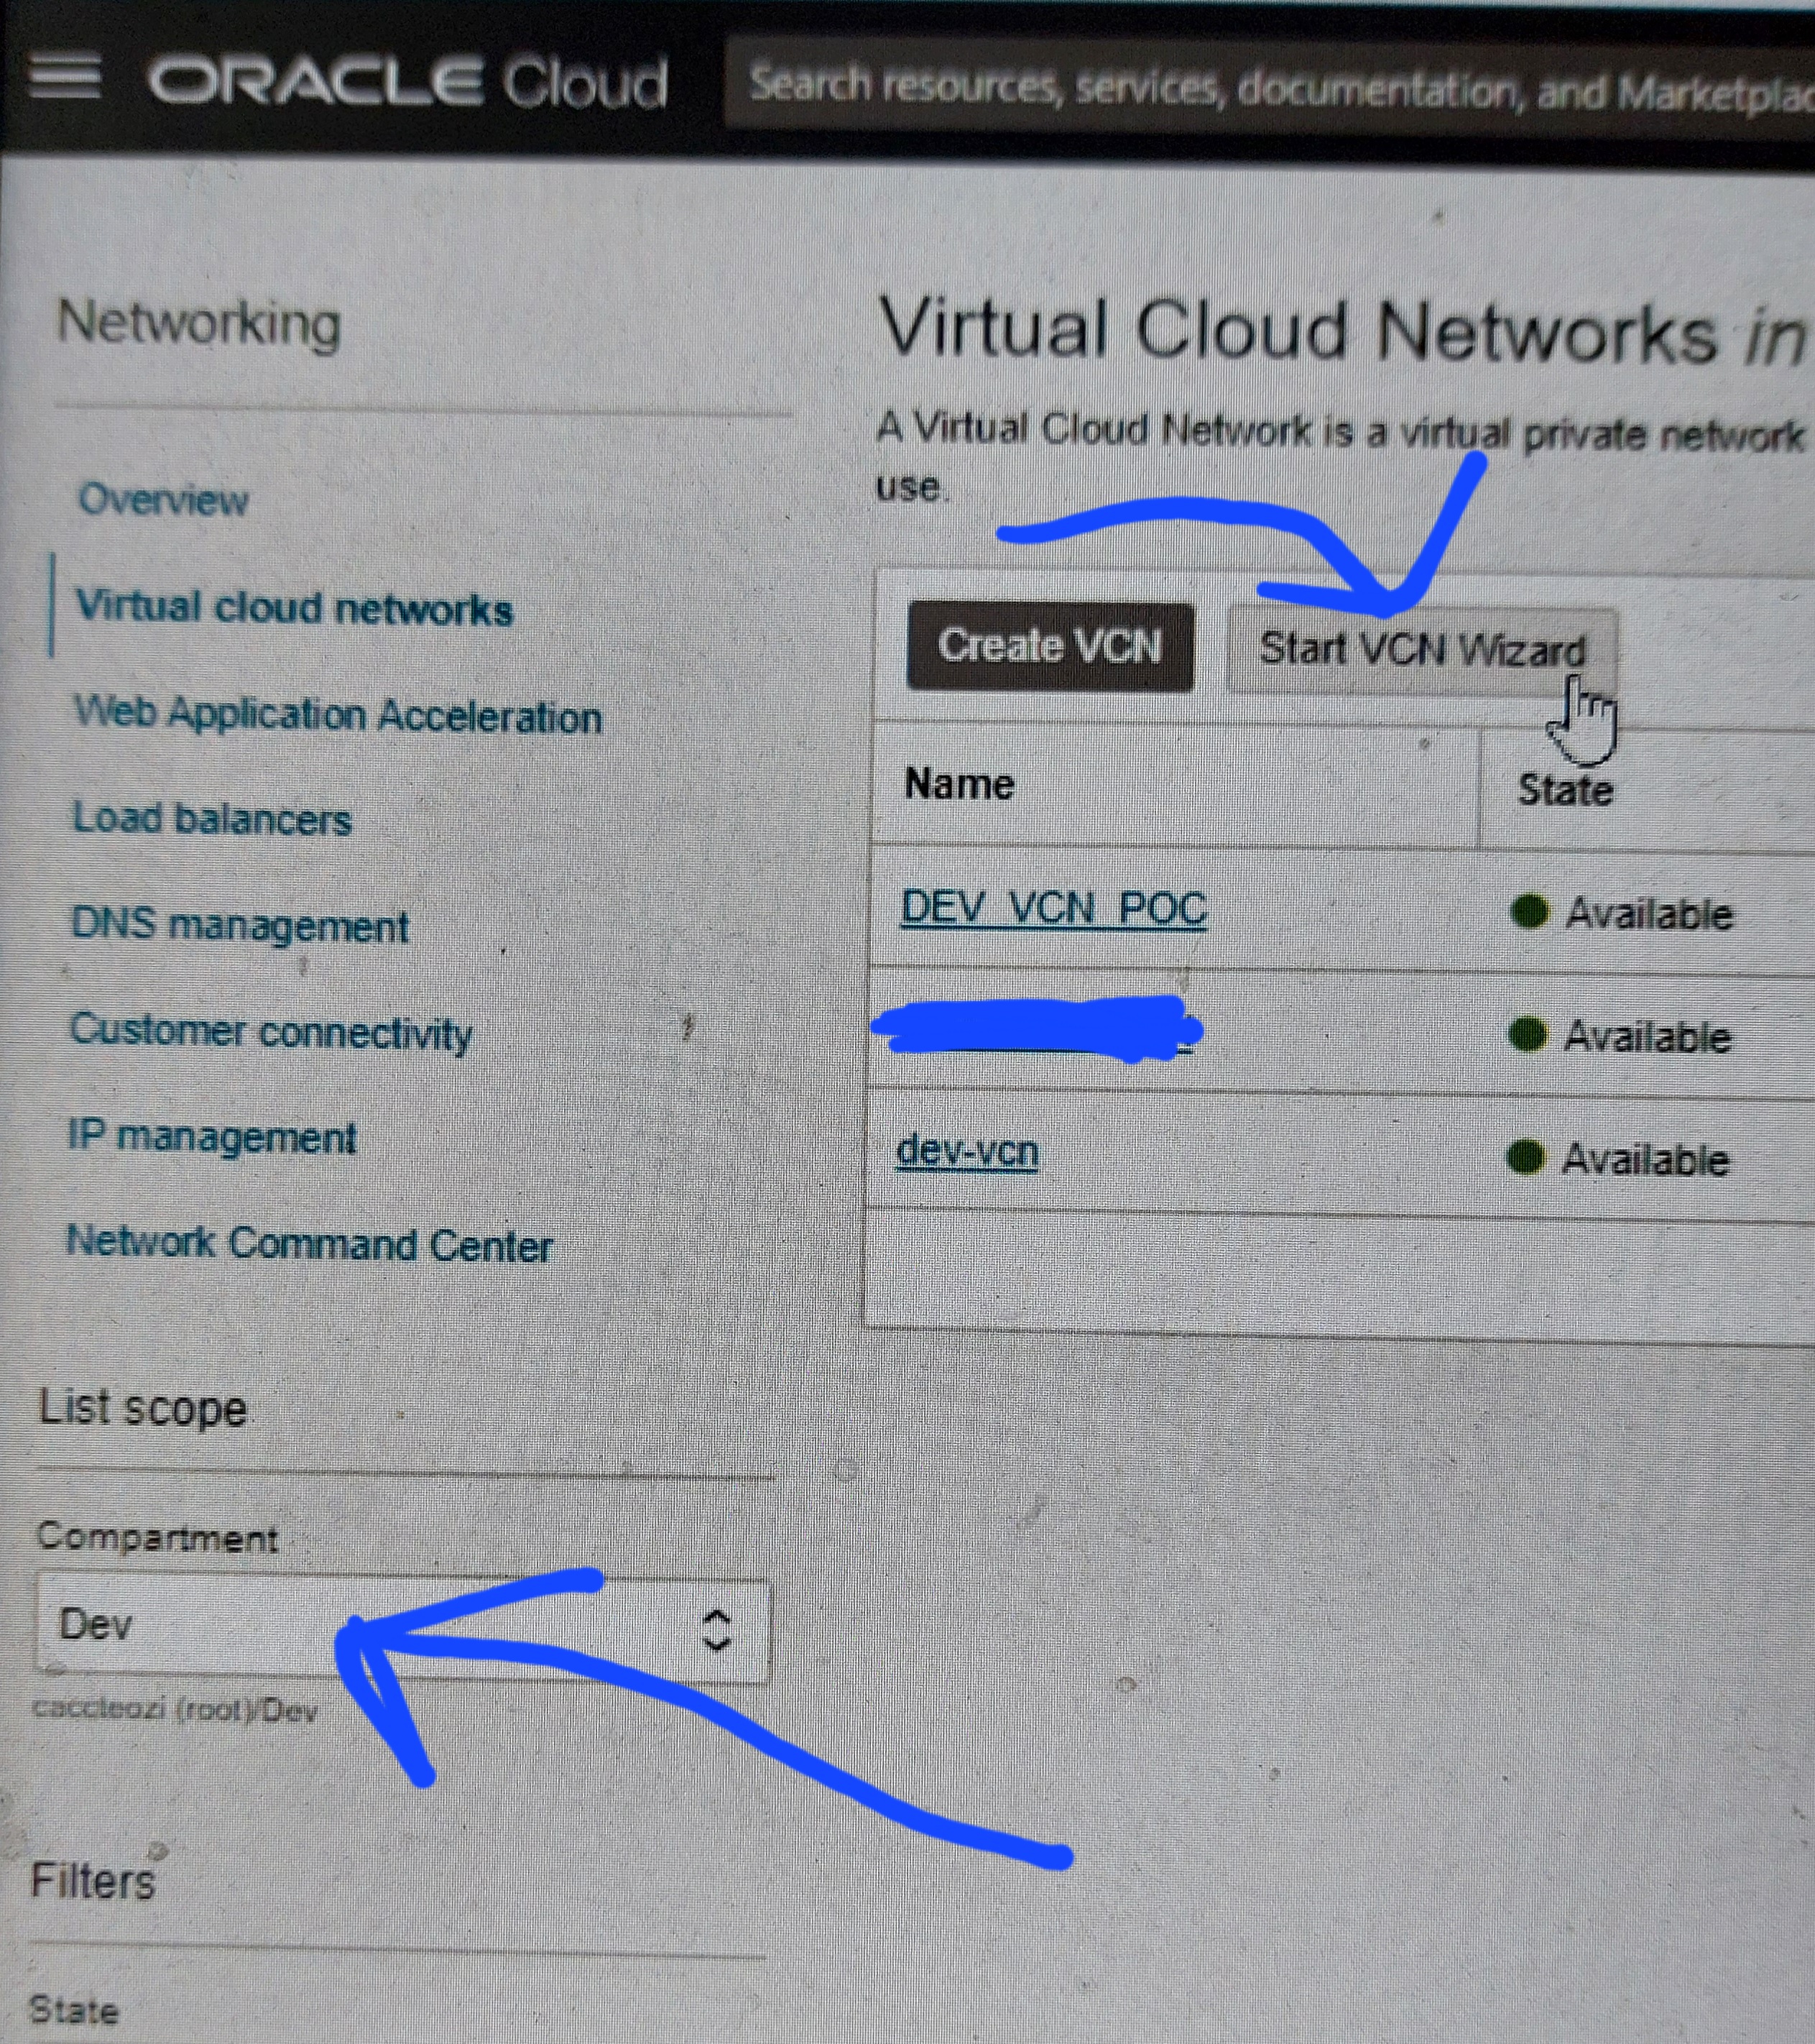
Navigation >> Developer Services >> API Management >> Gateways


I have already created couple of API gatways already. We will use one gateway and add anothet route.

Choose compartment >> click on one gateway


Deployment >> demo-api >>edit


Add another route >> 
Add path: /hello-java, method: POST, Gateway type: Oracle function, 

Choose compartment >> function app name >> function  name >> save


Function route added >> copy the endpoint for testing.


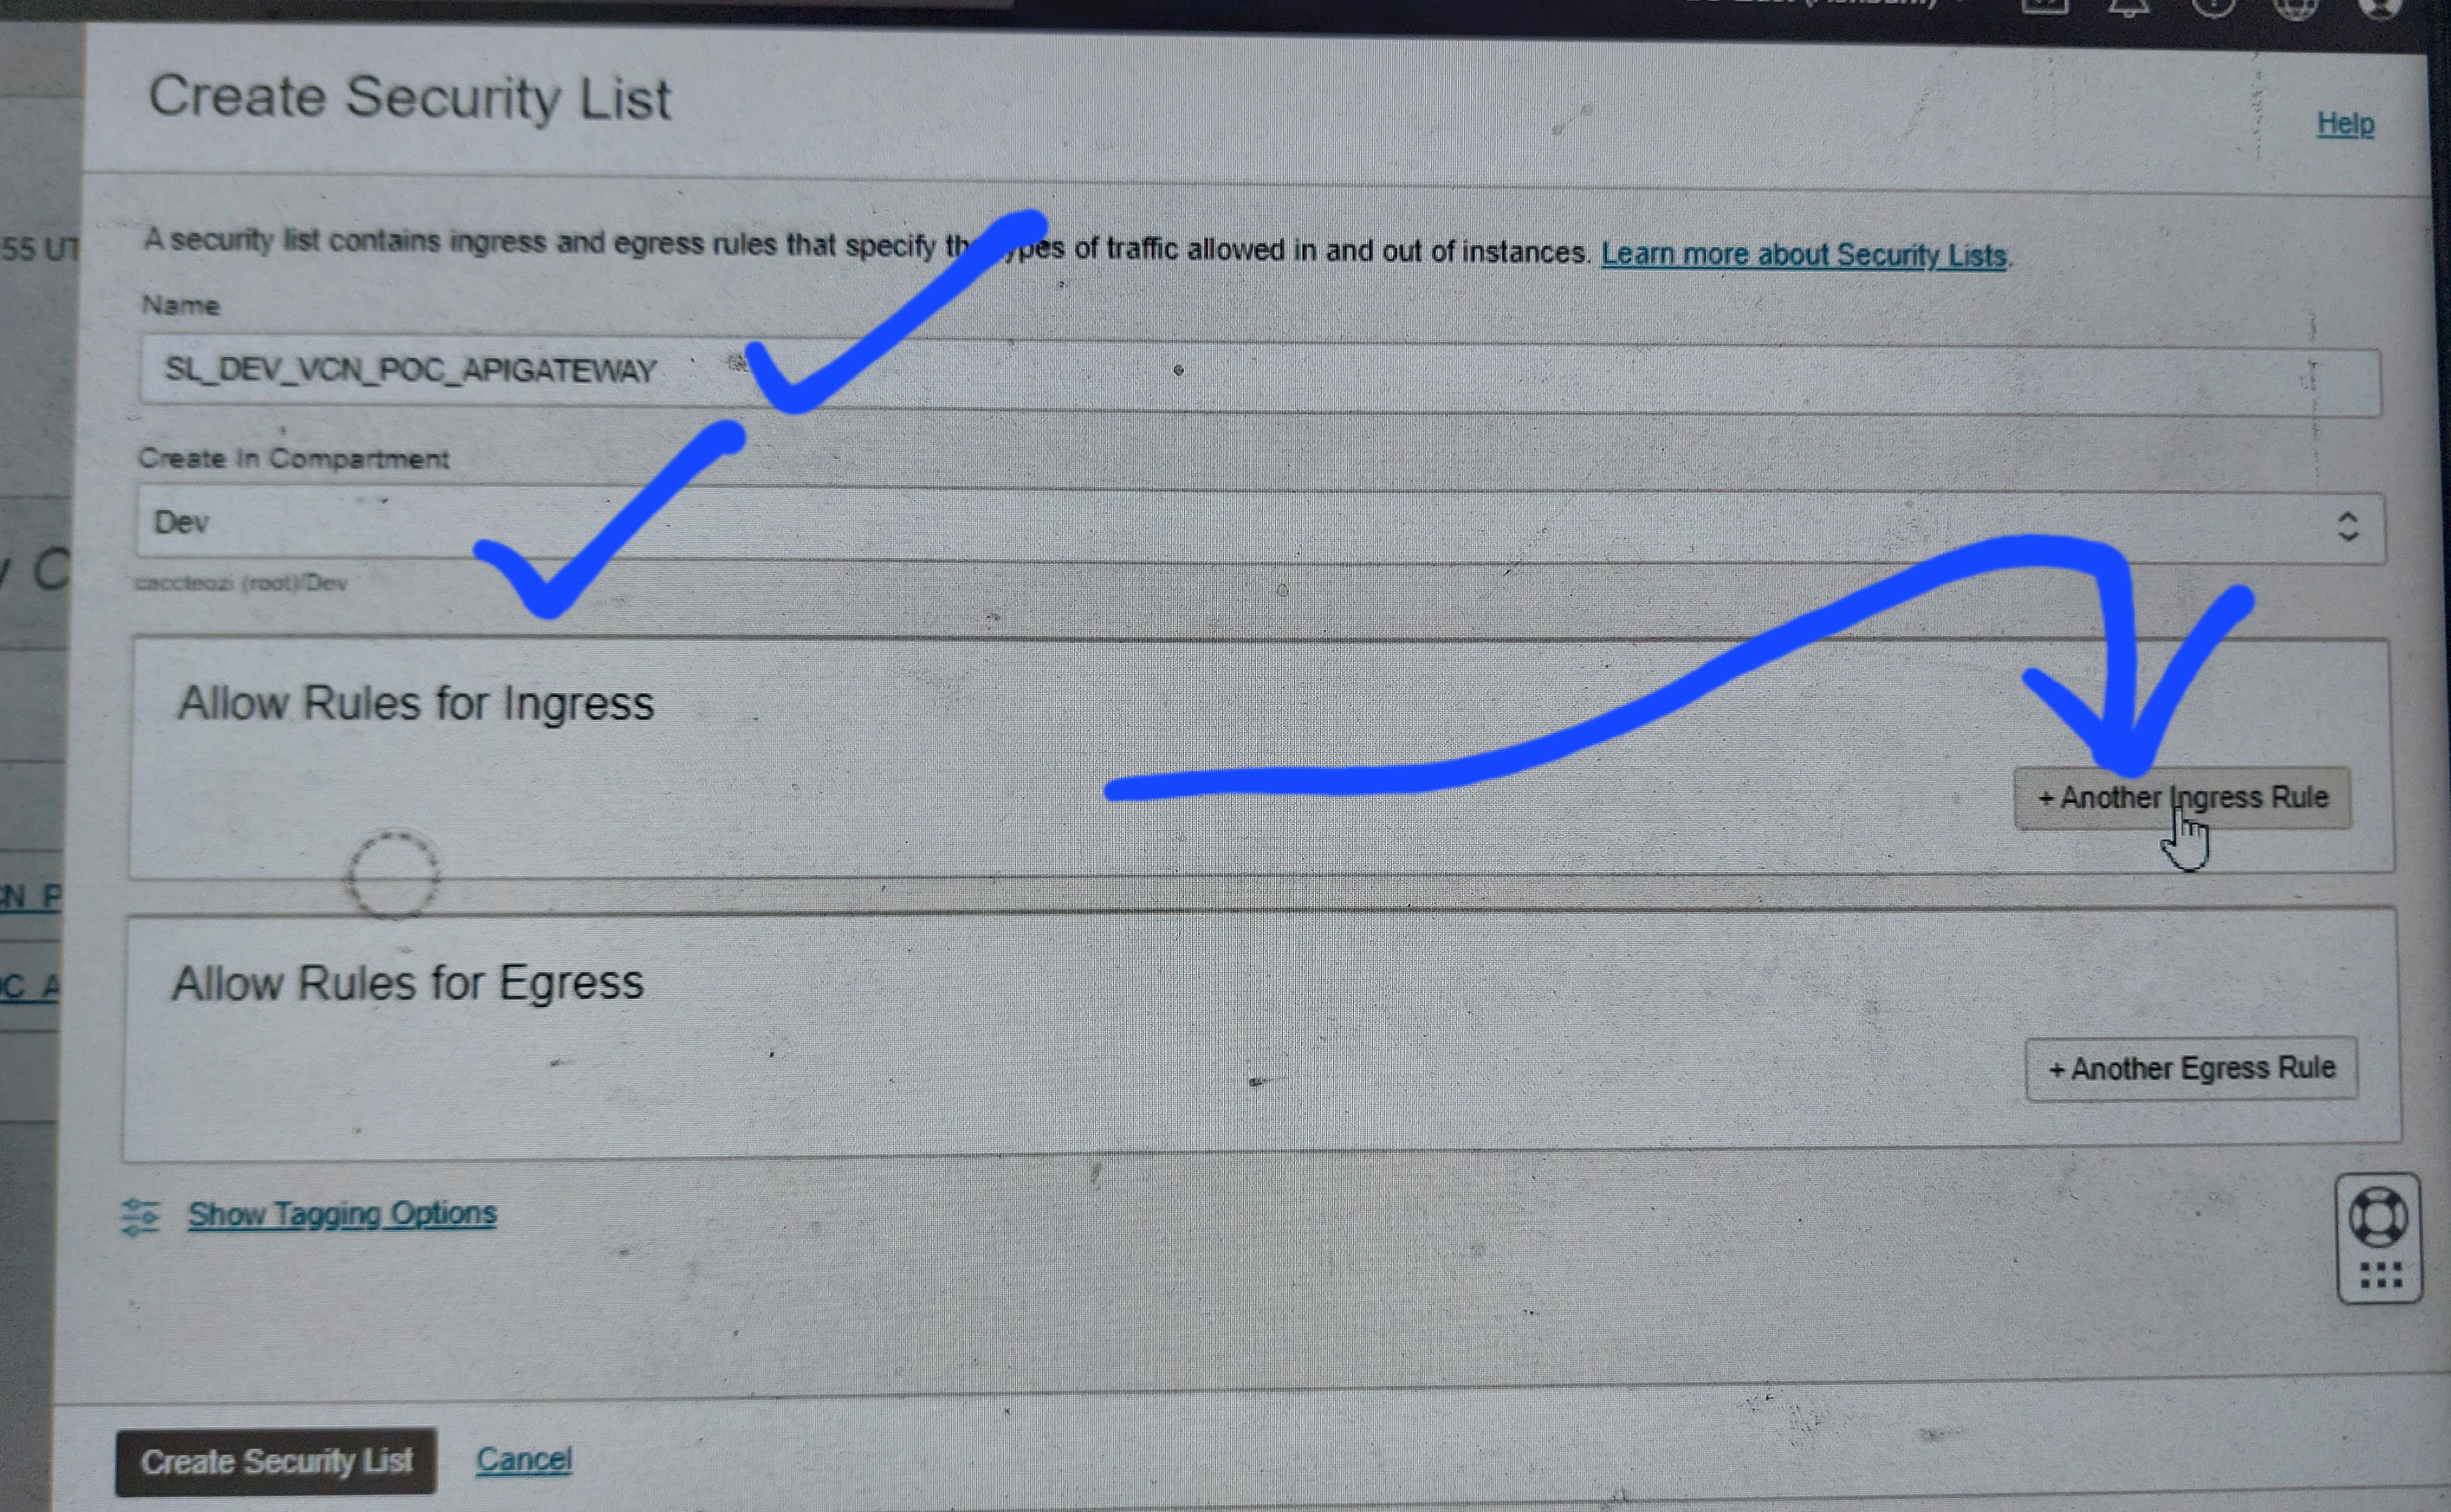
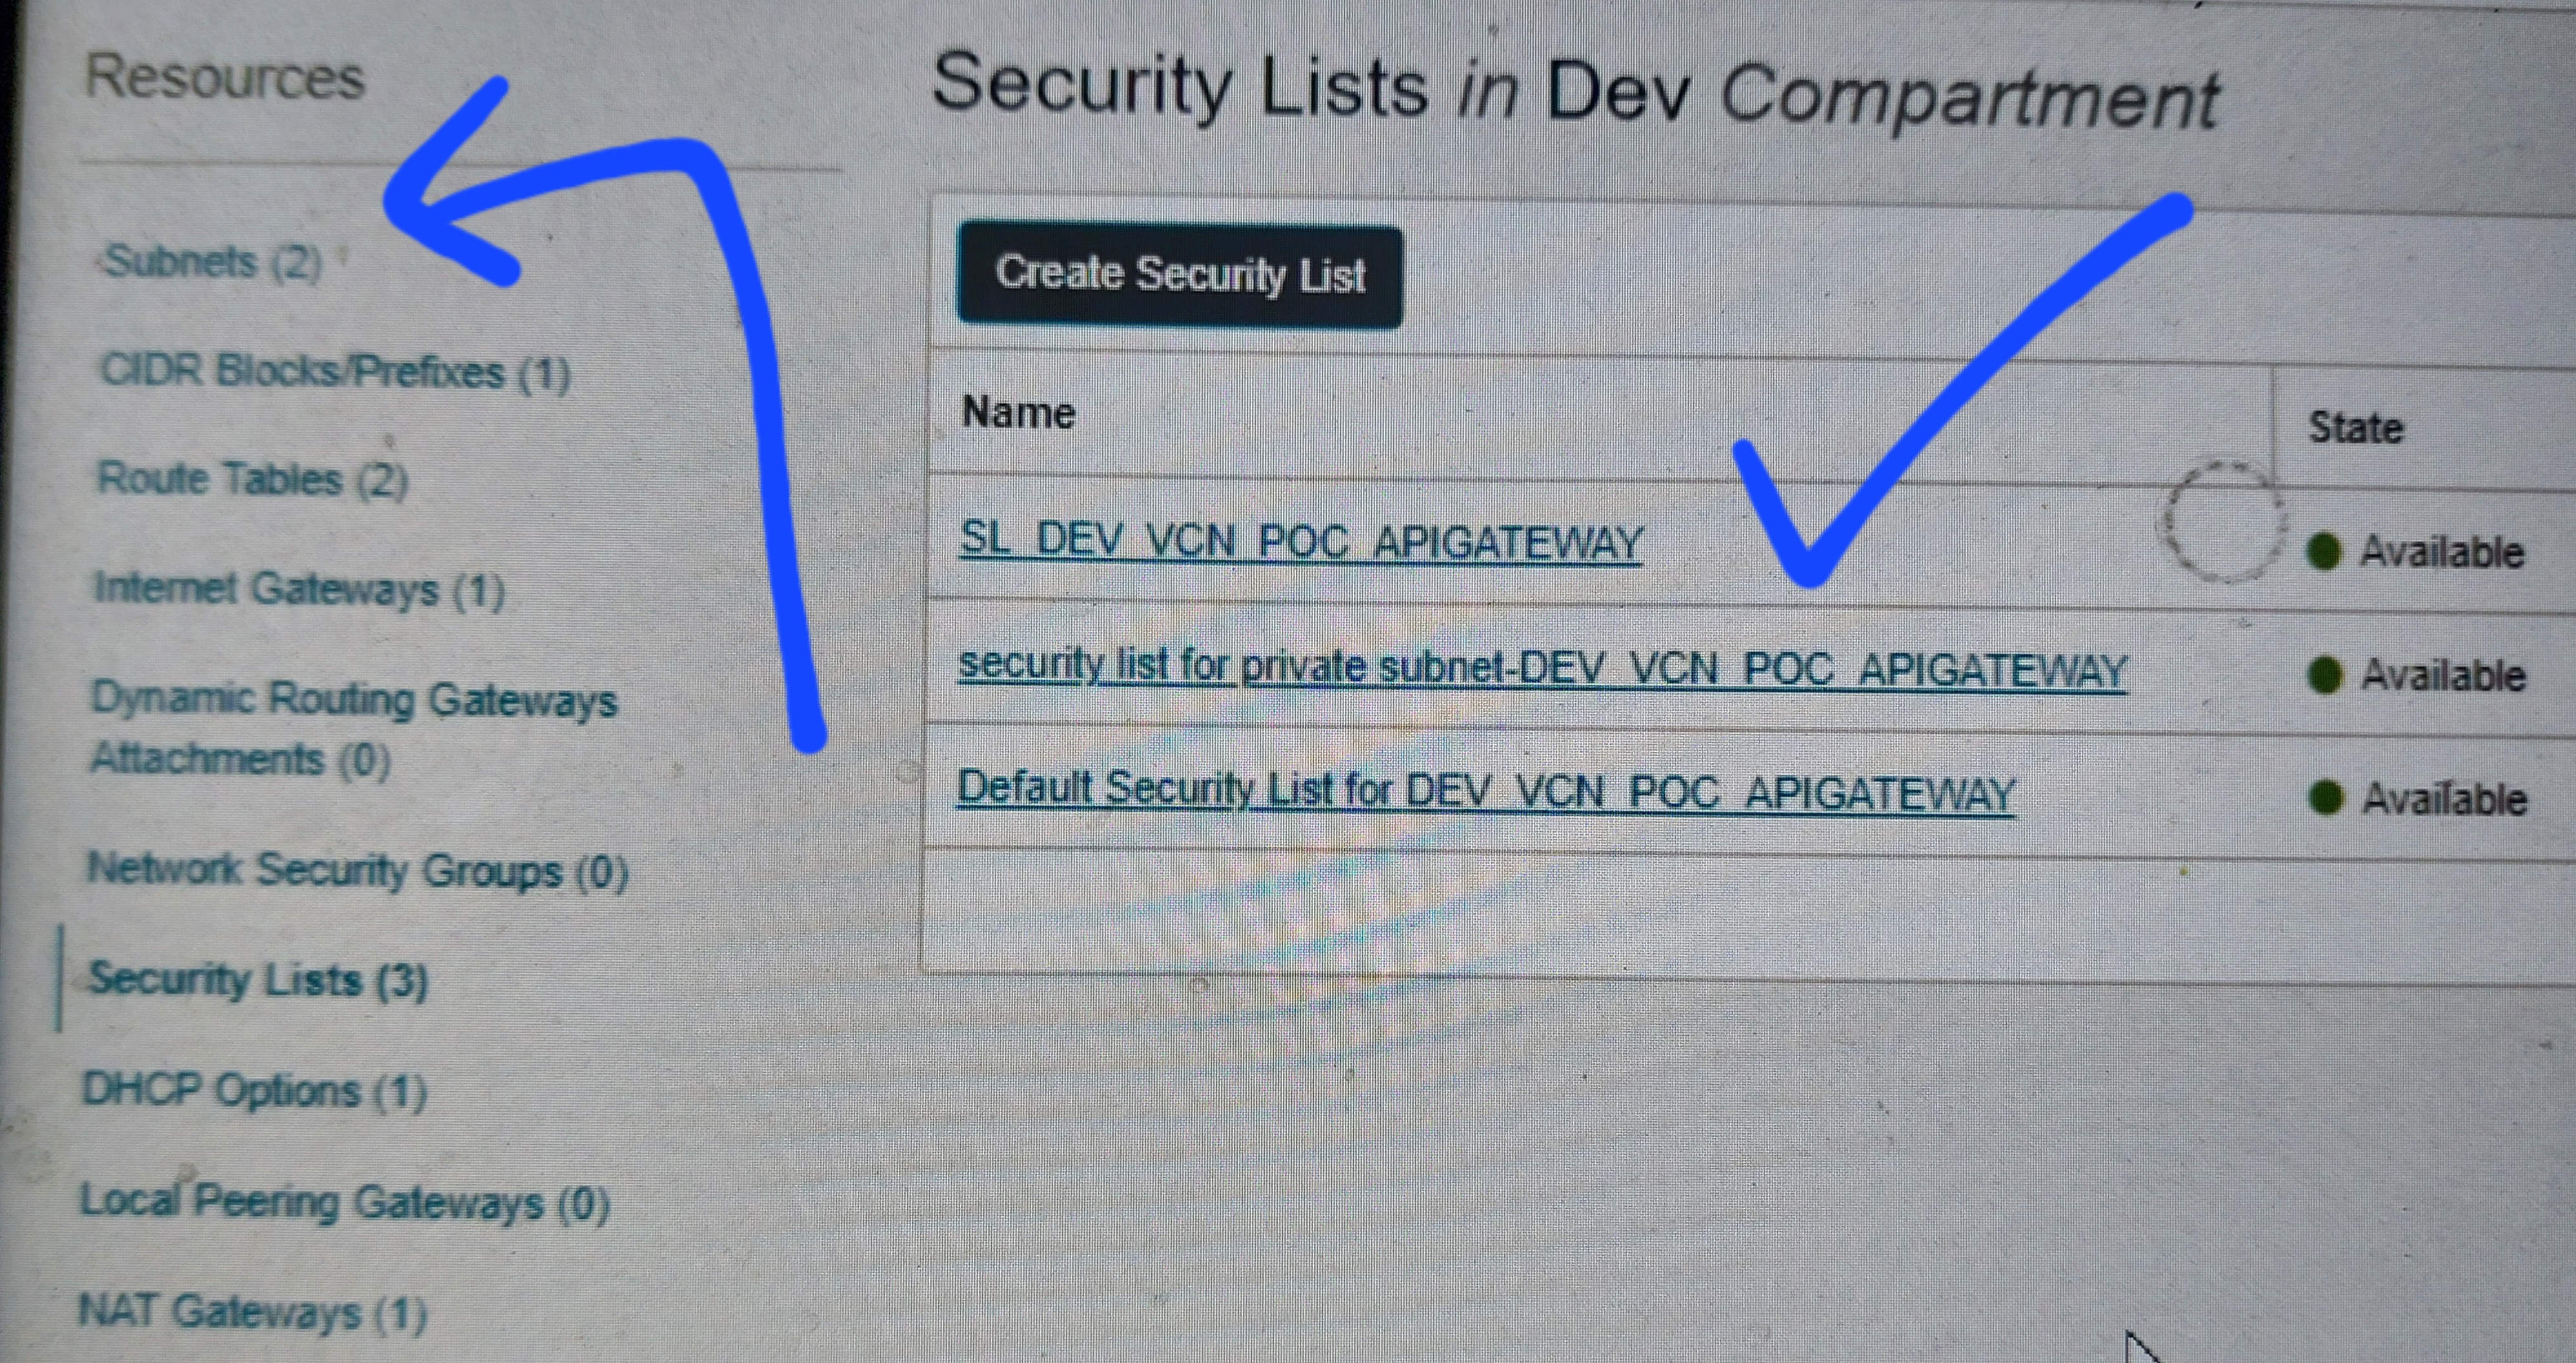
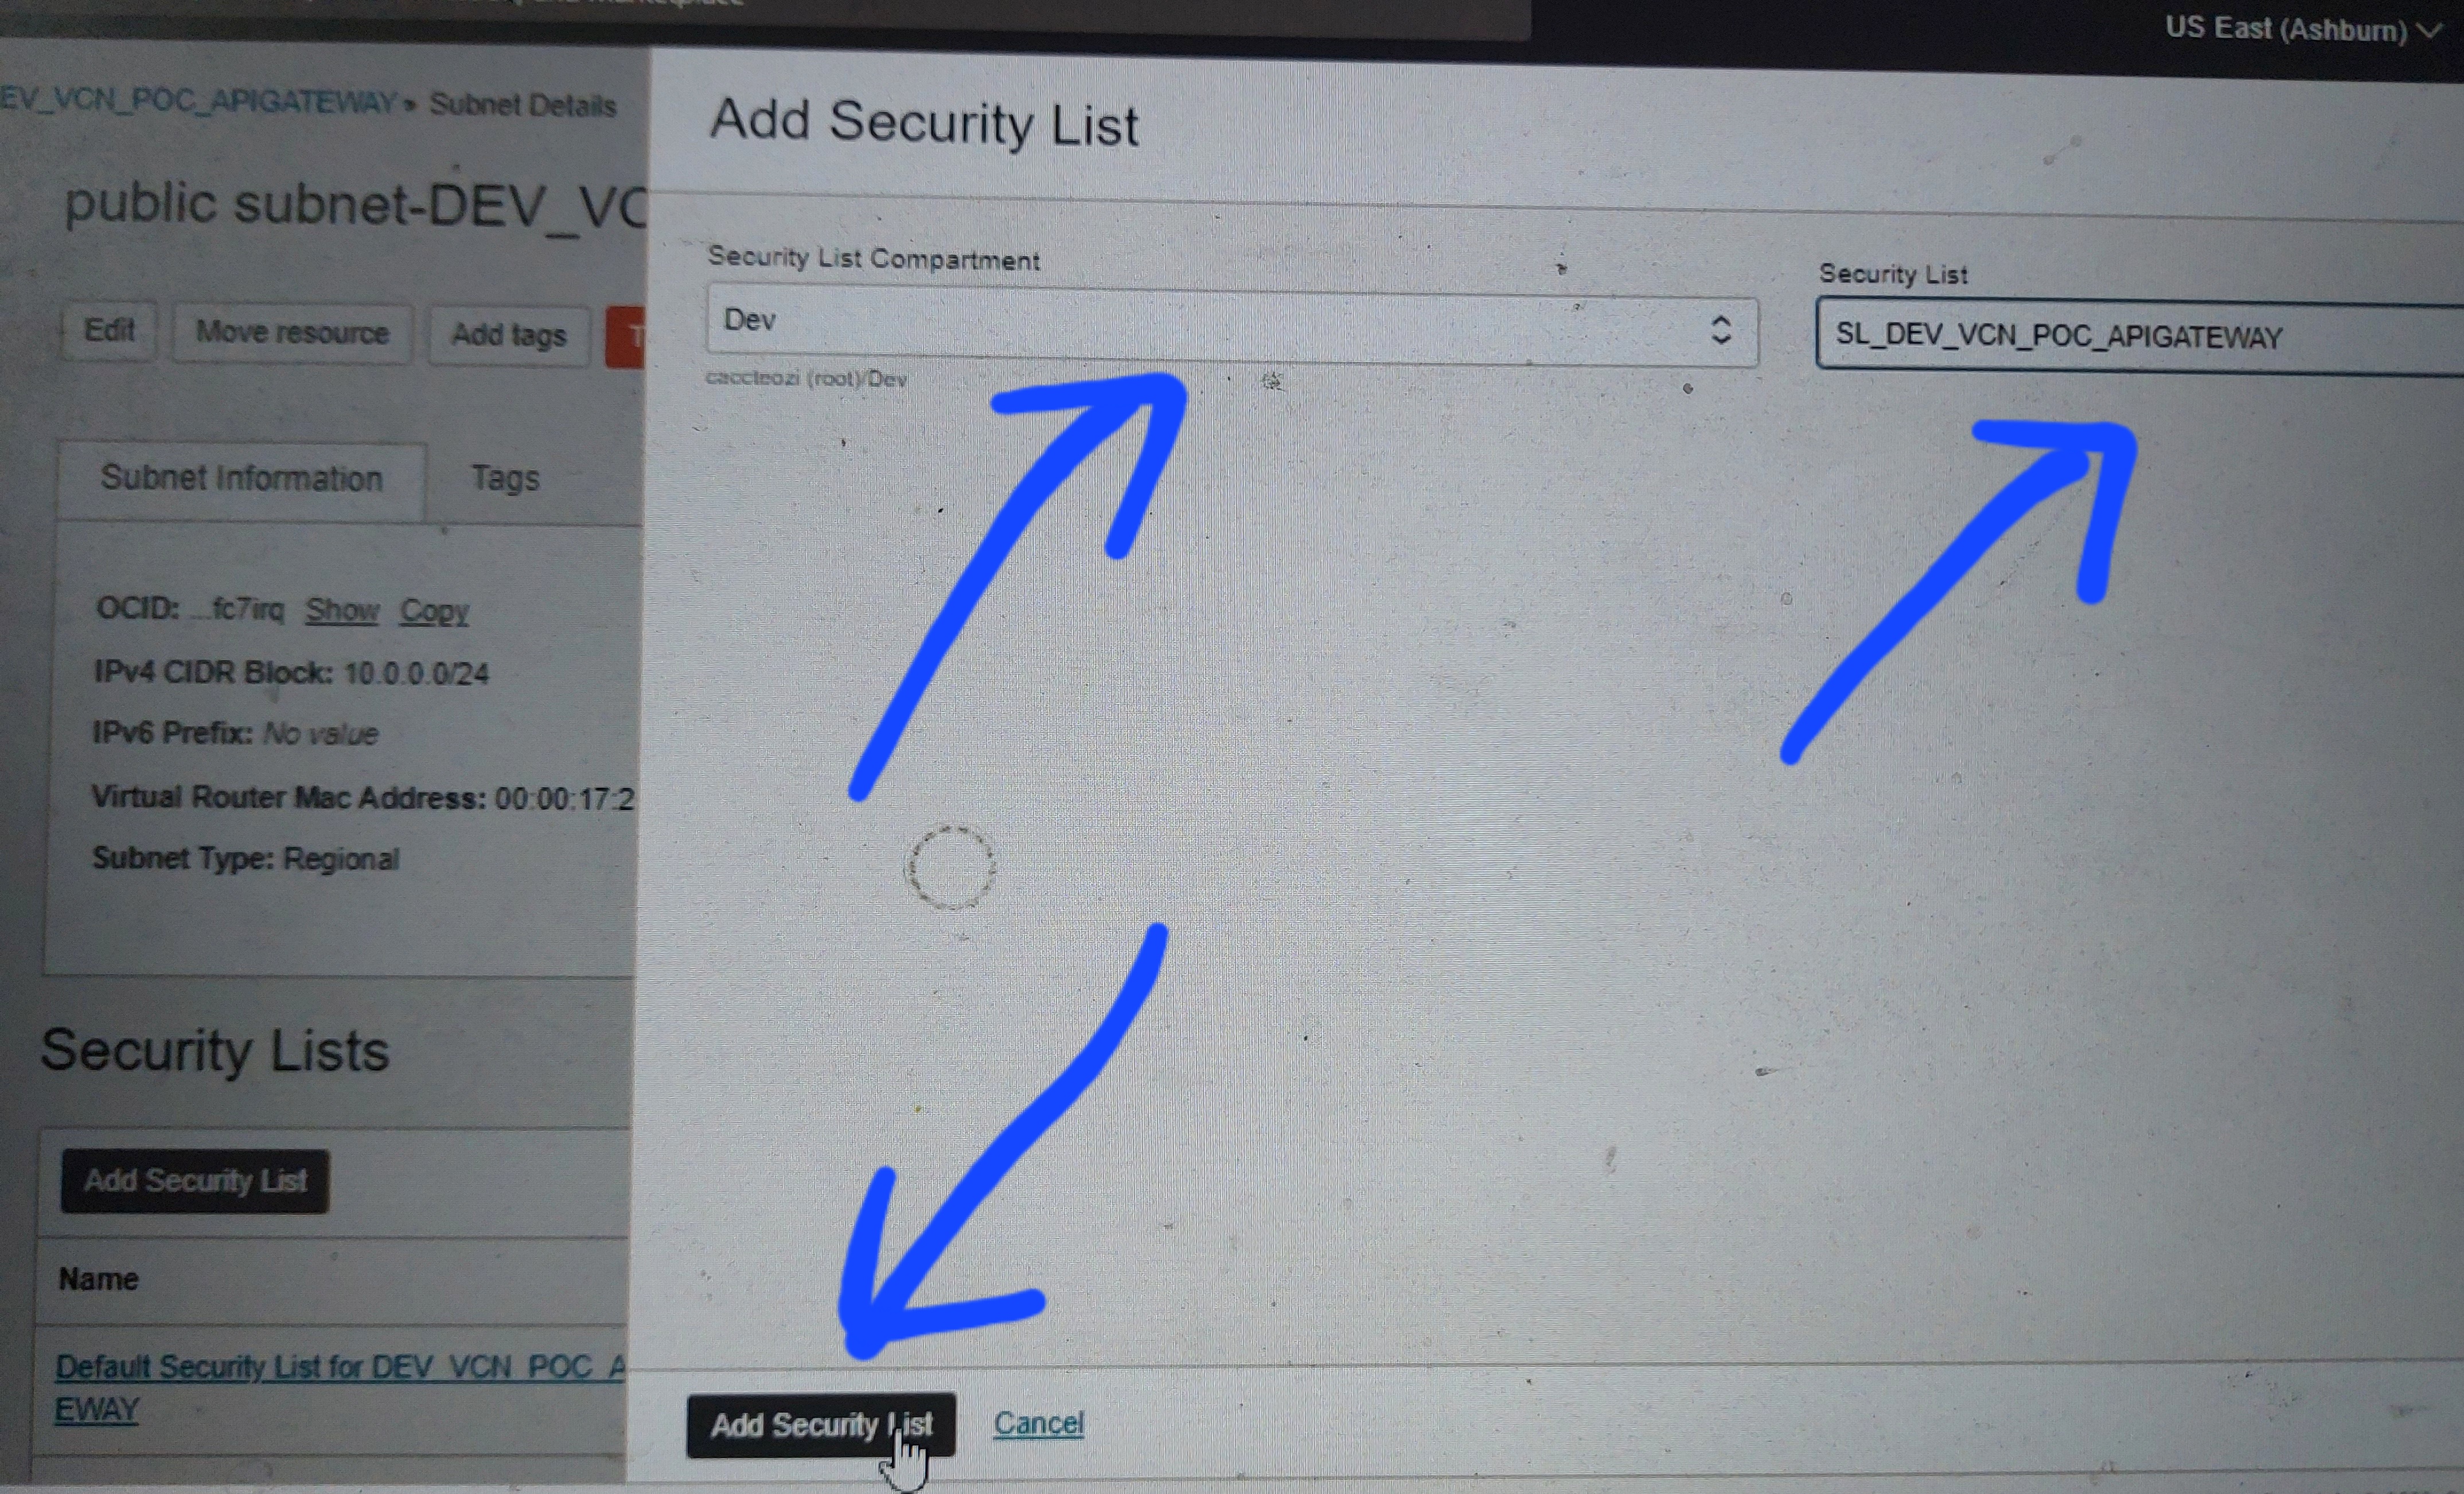
Step3: add a policy to the compartment so that any user can access.

Navigation >> Identity & Security >> Policies >> Create policy.


Here, I have already added the policy.
Policy details:

Allow any-user to use functions-family in compartment dev where ALL { request.principal.type='ApiGateway',request.resource.compartment.id='ocid1.compartment.oc1..aaaaaa.....'}


How to get the compartment id:
Navigation >> Identity & Security >> Compartments >> open your compartment and see the OCID >> just copy it and use it in the Policy.


We are ready now for testing:

Step4: Test Api gateway from postman

Postman >>
Method: post
Test URL : <endpoint of the deployement>/<route path>
Authorization >> basic >> add user and password for OCI console.


Raw >> test >> input:  Sanddy >> output : Hello, Sanddy !


Note: if we dont add the policy to the compartment where function resides, it will fail with 500 Internal server error.

Wednesday, April 12, 2023

OIC - Create an API Gateway to call Oracle Integration REST service

Usecase: we will create an API gateway in OCI console and call rest OIC service.

Highlevel steps:

  1. Create a rest OIC service which to be called from API gateway.
  2. Create a VCN(it will create two subnets : public and private)
  3. Create a security list(to get access) and add to the public subnet of the VCN
  4. Create an API Gateway
  5. Add deployment of the rest service to the gateway
  6. Take the API gatway deployem endpoint url and test in Postman

Detailed steps:

Login to OCI console >> networking >> Virtual Cloud Networks


Select compartment >> start VCN Wizard


Start VCN wizard


Provide VCN name and compartment.


Click create.


VCN created. Click View VCN.


2 subnets created >> private and public


Click Security Lists


Create Security List


Provide security list name, compartment >> add ingress rule


Source  CIDR : 0.0.0.0/0
Destination port range : 443


Security list created >> go to subnets


Open public subnet 


Add security list


Select the compartment >> add the security list.


Developer services >> API Management >> Gateways


Select compartment and create gateway.


Provide Gateway name, type, compartment >> provide VCN name, select public subnet.


Gateway created.


Deployments >> Create deployment


Provide api gatway details:

Name: demo-api
Path prefix : /demo-api/1.0
Compartment: dev


Selecting no authentication which is basic authentication.
Note: you can also go for single or multiple authentication options.


Provide route Service details:
Path: /testHello
Method: POST
Backend type: HTTP
URL


Provide different time out paramters >> click show route request policies


Add the Authorization : Basic base64 representation of username:passoword


Next


Create the deployment


Copy the endpoint of the deployment for testing.


Open in postman >> select basic authentication >> provide OCI user and password

Test url: OCI deploywent Endpoint/path of the URL added in the deployment.


Body >> raw >> json
Provide input data


Hurahha!!! It worked. We have received the response.

Featured Post

11g to 12c OSB projects migration points

1. Export 11g OSB code and import in 12c Jdeveloper. Steps to import OSB project in Jdeveloper:   File⇾Import⇾Service Bus Resources⇾ Se...