Friday, September 30, 2022

OIC - Create a Retry logic | To overcome putting file to AWS S3 bucket timeout issue

Usecase: We are trying to put file in S3 bucket using rest connection but unlucky that its getting failed and giving a timeout issue if its taking more than 2 minutes. So what we did, we have put a retry logic to try 3 times to put the files in S3.

Retry logic implemented:

  1. Take a assign variable and assign 2 variables: v_S3FileStatus ="error" and v_S3Counter = 0.0
  2. Assign file reference and PathAndFilename to move file to S3.
  3. Take a while loop with condition: $v_S3FileStatus = "error" and $v_S3Counter < 3.0
    1. Take a scope within the while loop
      1. Drag and drop S3 Rest connection and configure to put files in s3.
      2. Take a assign activity and assign v_S3FileStatus = "success"
  4. Open the scope default fault handler and assign as => v_S3Counter = $v_S3Counter + 1.0 and v_S3FileStatus = "error"

Steps with screenshots:


Wednesday, September 14, 2022

OCI - How to get Tenancy OCID, User OCID, Private Key and Fingerprint

Tenancy OCID: get the Tenancy OCID from the OCI console on the Tenancy Details page.

Search Tenancy in the search box


Or from profile >> Tennacy


User OCID : get the user's OCID in the console on the User details page.

Profile >> User Settings


Private Key & FingerPrint: 

Profile >> User settings >> API Keys >> Add API Key >> download private key >> add >> note the fingerprint.


Note: Private key downloaded from the Oracle Cloud Infrastructure Console are in PKCS8 format. The OCI Signature version 1 security policy available with the Rest adapter only supports reading of the private key in RSA format(PKCS1) format.

If you receive the following error, you must convert the private key from PKCS8 to RSA(PKC1) format:

oracle.cloud.connector.impl.rest.security.signature.signatureException: java.lang.ClassCastException: org.bouncycastle.asn1.pkcs.PrivateKeyInfo can not be cast to org.bouncycastle.openssl.PEMKeyPair.

Convert the private key with the following command:

openssl rsa -in private_key_in_pkcs8_format.pem -out new_converted_file.pem

We can also convert it using online available site like below:

https://8gwifi.org/pemconvert.jsp

OIC - How to invoke OCI Function from Oracle Integration Cloud

Usecase: Here, we will call a helloworld OCI oracle function from Oracle Integration Cloud.

This feature allows OIC to invoke custom code deployed in this serverless framework, thus expanding its range of capabilities.

Highlevel steps:

  1. Create a rest connection with the function invoke endpoint, received from the OCI.
  2. Create an integration and invoke function invoke endpoint and feed input name and get the response back from the function.

Detailed Steps:

Step1: First create a function in OCI console. You can follow my previous blog:

OCI Create a deafult helloworld oracle function in Oracle Cloud Infrastructure console

Step2: Create a Rest connection

To create rest connection, we need following information:

Connection type: REST API Base URL

Connection URL: this we will get from the function invoke endpoint.

Security: OCI Signature version 1

Tenancy OCID, User OCId, Private Key and Fingerprint: follow my below blog to get them from OCI.

OCI - How to get Tenancy OCID, User OCID, Private Key and Fingerprint


Step3: Create an Integration to call the function.

I have created an App driven Orchestration integration

Integration flow:


Configure expose side rest request and response part. One Input : inputName and output: Response


Call the created rest connection and configure function invoke part:

URI: get ot from OCI function endpoint
Verb: post

Select request and response payload as binary and text/plain.


Map the input to the function call. 


Map the function response to rest response.


Testing:


Tuesday, September 13, 2022

OCI - Create a Hello World default Oracle function in Oracle Cloud Infrastructure console

What are Functions:

"Oracle Functions is based on Fn Project. Fn project is an open source, container native, serverless platform that can be run anywhere, It's easy to use, supports every programming languages, and is extensible and performant"

These functions can be written in a variety of languages - Java , Python, Node etc. You write and deploy the code, Oracle takes care of provisioning, scaling etc.

How do Oracle Functions enhance the OIC experience?

Suppose you are porting SOA composites to OIC and you want to use of Java embedding in your BPEL process. Where we shall the code in OIC? Functions can be leveraged to implement business logic that can not be defined using standard OIC actions. We can use javascript feature but that to have its limitation upto a level.

Function Creation Steps:

Step1: Create an application 

Sign into the OCI console >> Navigation menu >> Developer Services >> Functions >> Applications >> choose the compartment >> Click Create Application


Provide Application name like helloworld-app. Select VCN and subnet in which to run the function.

Here , Selected a public subnet. >> click create.
 
Note: a Public subnet requires an Internet gateway in the VCN and a private subnet requires a service gateway in the VCN.


Step2 : Setup your Cloud Shell dev Environment.

On the applications page >> click your app , here, helloworld-app. >> click Getting started link >> click Cloud Shell Setup.


Step3: setup Fn CLI on Cloud Shell

Most of all details we will get in the getting started page steps. So dont worry of the <> bracket details.

A. Use the context for your region

fn list context

fn use context <region-context> 

My case region-context = us-ashburn-1

B. Update the context with the functions compartment ID

fn update context oracle.compartment-id <compartment-ocid>

C. Provide a unique repository name prefix to distinguish your function images from other people's.

fn update context registry <region-key>.ocir.io/<tenancy-namespace>/<repo-name-prefix>

Example:

fn update context registry iad.ocir.io/idsvxxxxxxxx/test-repo

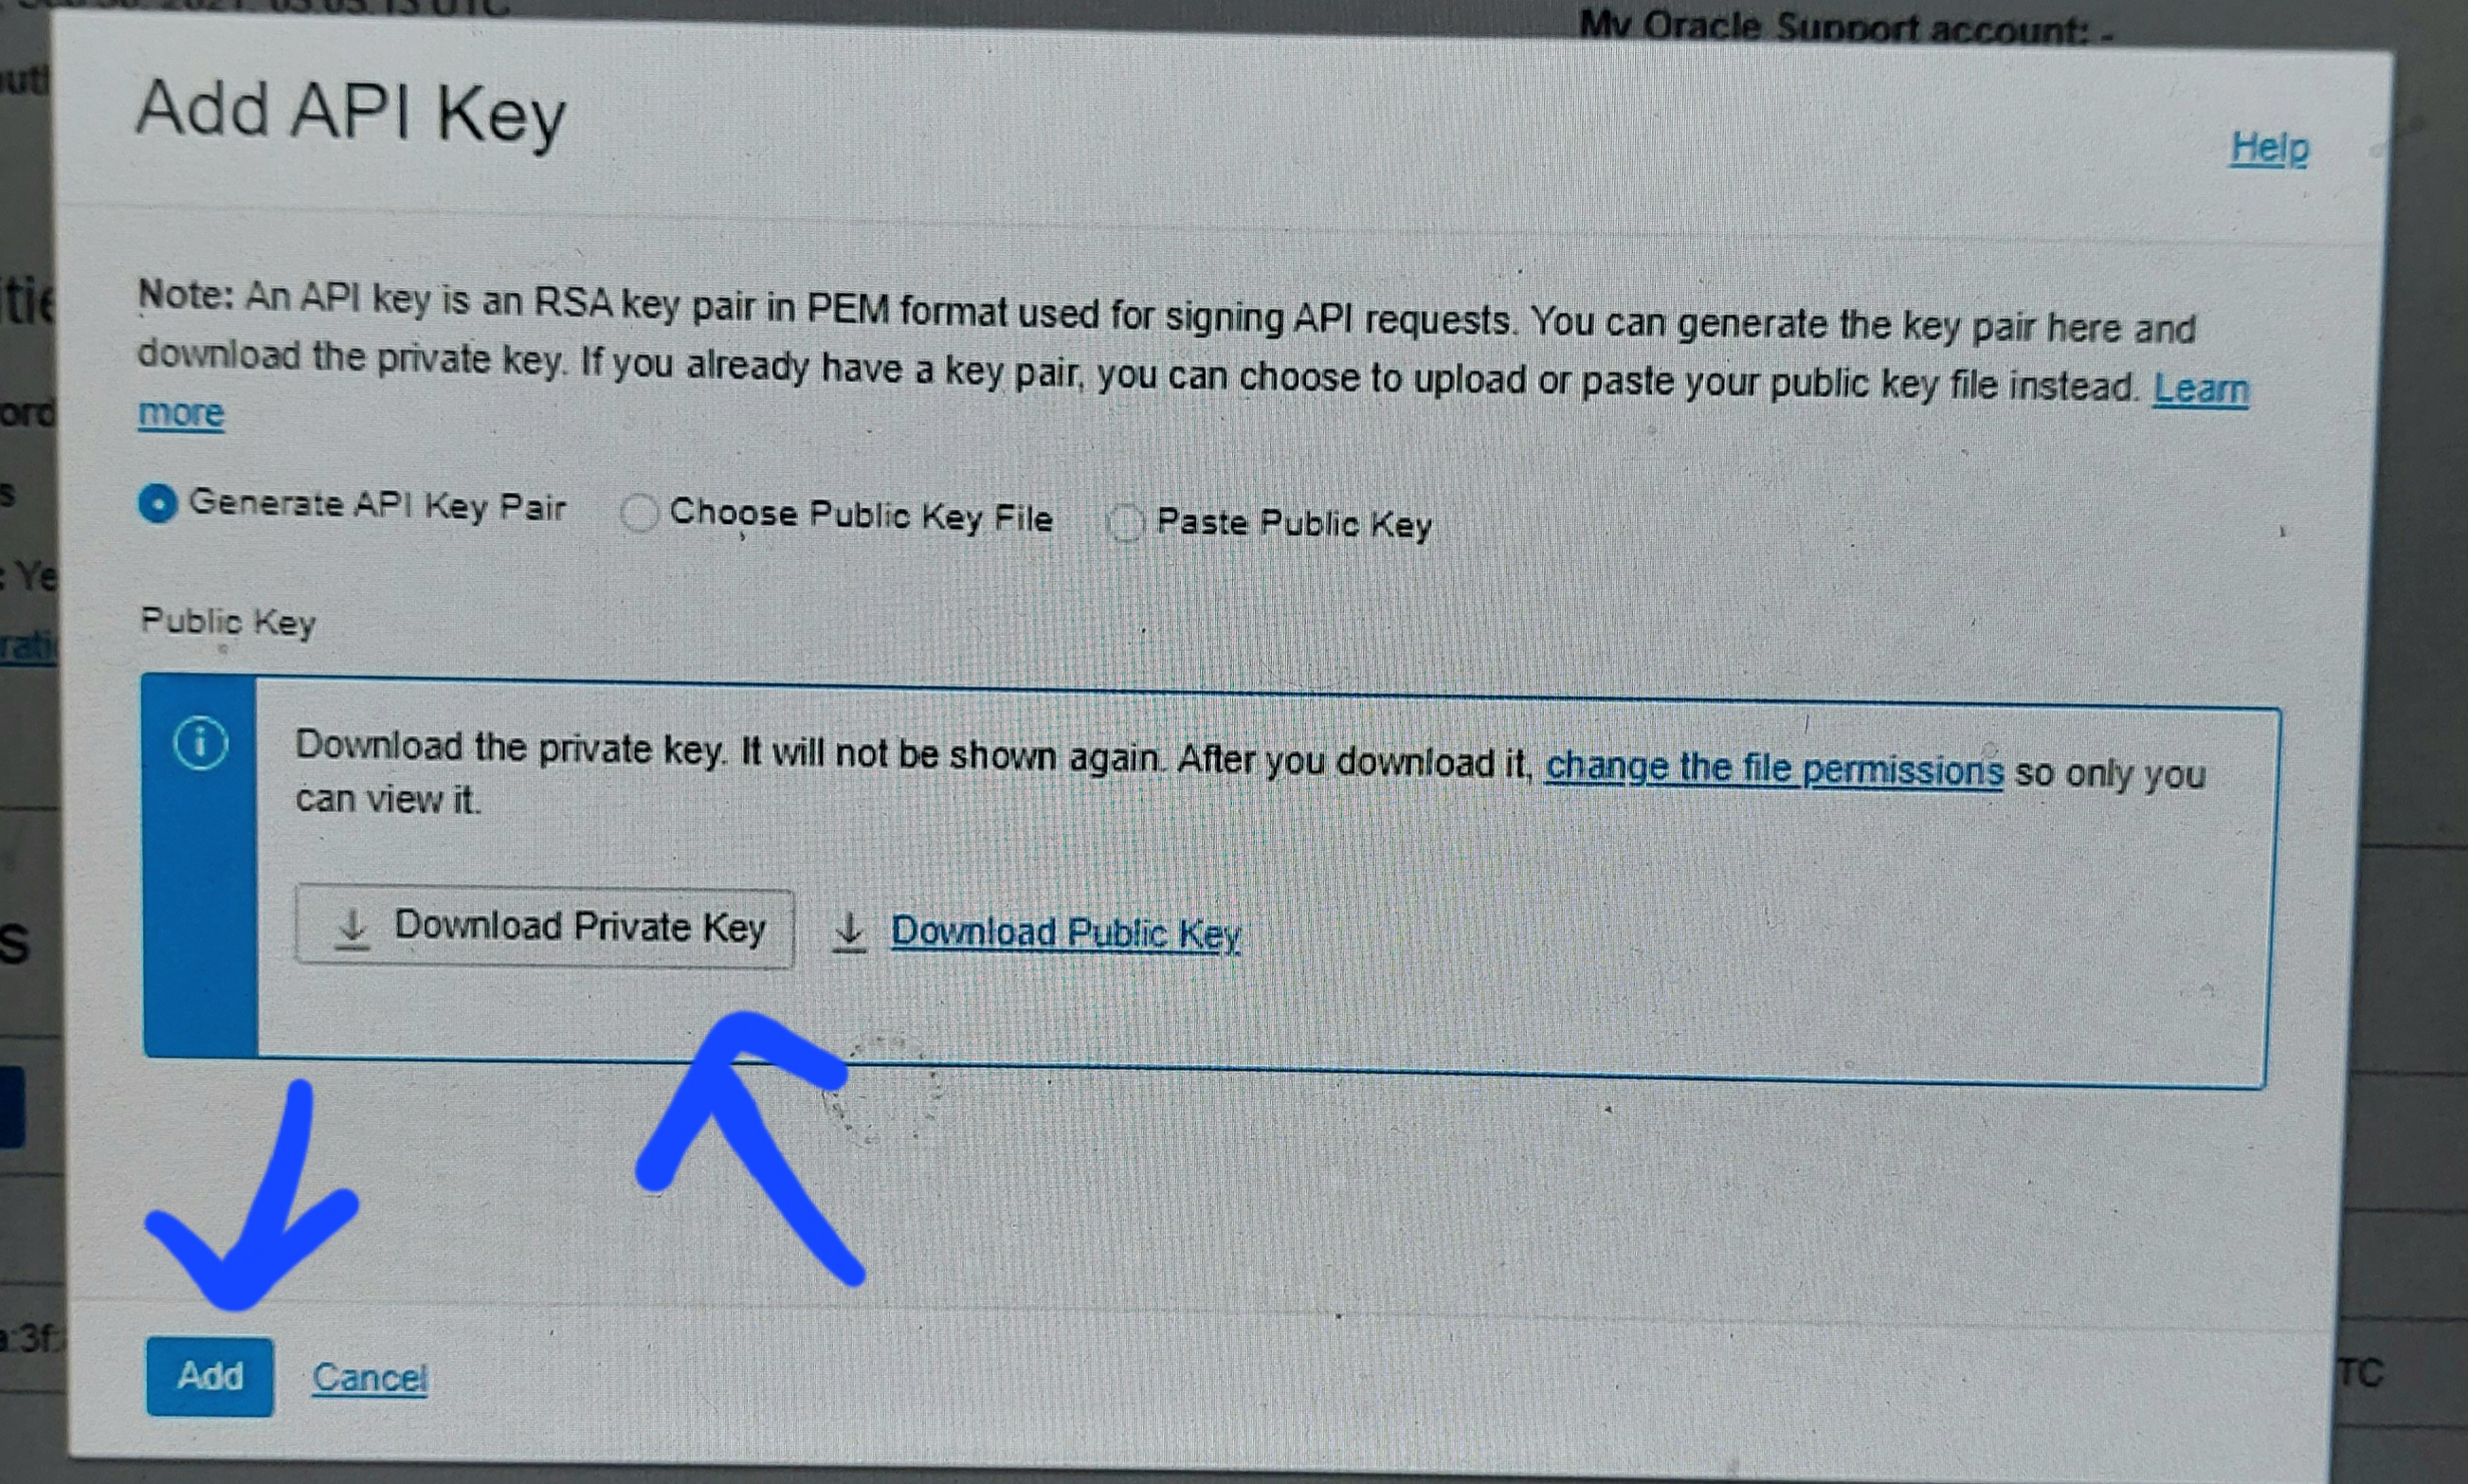
D. Generate an Auth Token : click Generate an Auth token to display the Auth token pages >> click Generate Token >> Enter a meaningful auth token name and generate token >> copy the auth token >> close.

E. Log into the Registry using retrieved Auth Token as your password.

docker login -u '<tenancy-namespace>/<user-name>' <region-key>.ocir.io

For example:

docker login -u 'idsvxxxxxxxx/cloudconsole/xxxxx' iad.ocir.io

F. Verify your setup by listing applications in the compartment

fn list apps

Step4: Create , Deploy and Invoke your function

G. Generate a hello- world function

fn init --runtime java hello-java

This will create the following in the hello-java directory:

  • func.yaml: function definition file
  • /src directory: Contains source files and directories for the helloworld function
  • pom.xml : a Maven config file that specifies the dependencies required to compile the function.
H. Switch into the generated directory

cd hello-java


Traverse following folders to see the created deafult java helloworld code:

 src >> main >> java >> com >> example >> fn >> HelloFunction.java

cat HelloFunction.java

package com.example.fn;

public class HelloFunction {

public String handleRequest(String input){

String name = (input == null || input.isEmpty()) ? "world" : input;

System.out.println("Inside Java Hello World function");

return "Hello, " + name + "!";

}

}

I. Deploy your fucntion

fn -v deploy --app helloworld-app

J. INVOKE or Test your function

fn invoke helloworld-app hello-java


Note: Suppose you want to create custom java code , then you have to modify the entry in the func.yaml and pom.xml files accordingly.

Step5: click the Functions >> see the created the hello-java function and invoke endpoint details.


Step6: Enable the logging:


References:

https://docs.oracle.com/en-us/iaas/Content/Functions/Tasks/functionsquickstartcloudshell.htm#


Wednesday, September 7, 2022

ODI 12C - Introduction

Simply if we look at our own house, we can see data is generating everywhere, whereever using Laptop, tab, mobile, PC etc all systems are generating data. Similarly, If we think of an Enterprise that also has different application generating data for different purposes and we need to fetch data from all these applications like ERP, Concur,Saleforce, ADP  Peoplesoft, Lotus notes, Warehouse management system and access etc.. to sync all the systems or analytical reporting purposes. Before ODI comes into the picture or any informatica or integration tool, the integration of all these system, at the end looks complex. 

With the use of ODI, We can get or integrate the systems very easily and also store all the systems data into a data warehouse system and reports can be easily generated using Analytical tool like FAW.

Using previous versions of ODI, we were doing ETL load(Extract to staging server, Transform and load to Target table).


Unlike ETL tools which need a separate staging server, ODI 12c just need an staging area within target database. As there is no need of staging server, there is considerable savings on infrastructure related expenses. This approach is called ELT load.


If you think of using Informita , no way, BI apps 11g and above version does not work or support with informatica. Existing Oracle BI apps customer will have to move their ETL toll to ODI if they want upgrade to latest version of BI apps.

What is ODI:

  • Data integration involves combining data from several disparate sources which are stored using various technologies and provide a unified view of the data.
  • ODI is a comprehensive data integration platform that covers all the data integration requitements : from high-volume, high- performance batch loads  to event-driven, trickle feed integration.
  • It is an ELT tool(extract, load and transform) used for high speed data movement between disparate systems.
  • ODI was initially called as "Sunopsis data integrator". Oracle acquired Sunopsis in 2006 and then it becomes ODI.


Why Data Inegrator:

For a real life scenario,

We have a complex system landscape, if a management person wants a consolidated reporting from all these applications then that data has to be read individually from each application and then consolidate them which will humongous time and lot of efforts.

Instead, using the ODI we can integrate all the systens data to one place like ina Data warehouse and using warehouse analytic tool, we can go for reports. This approach is scalable and less expensive to maintain.

ODI studio overview /navigators:


ODI Development process flow:


Process flow points:
  • Once ODI install done, Admin goes through the security and reviews ODI users, their profiles and priviledges.
  • Next Admin creates connections between ODI repository and other source and target databases etc.
  • Developer will create the model (reverse engineer metadata) of the connections and maps between source and target objects. We can also use Procedure which is another way to transfer the data from source to target. 
  • Next create package which contains process flow showing sequences in which these procedures and mappings will run.
  • After package is created , next step is to run these packages, to organize all these packages, will create scenario. Scenario is a frozen snapshot of mappings or packages. Once the scenario is created, it can be migrated to different environments without the need of mihrating the related components like packges and mappings.
  • Next, we will create a load plan which describes the hierarchy of steps of scenarios to be executed in series or parallel.
  • Using agents, we can schedule the ODI load plans and scenario.

Data flow architecture:


Flow points:

  • Once, source and target connections and model created, LKM - load knowledge module comes into picture and loads the source data to target staging C$ table.
  • IKM - Integration knowledge module helps to load the that from staging table to target table.
  • CKM - Check knowledge module helps for data constraints check before load to target table.
ODI Repository:
  • Repository is nothing but a relational database containing all the ODI details.
  • In general, they are created using Repository creation utility (RCU).
  • Two main schema in repository are master and work repository (one or multiple).
  • Master repository contains system topology like connections details of the source data, target data and versions of project components, security.
  • Work repository contains metadata for model like source and target tables and project design components like mapping between the source and target tables as well as components like procedures, functions, packages etc.
  • Work repo should always be attached to a Master repo.
  • Work repository further divided in Development and Execution repository.
    • Development repo:
      •  contains all the development object like models, project details, scenarios, load plans as wells as the execution logs.
      • Used for dev environments
    • Execution repo 
      • contains only execution components like scenarios and load plans.
      • Used for prod environments
Agents:
ODI agents are light weight java process that orchestrates the overall data integration process. We can not schedule scenarios and run load plans without agents.

Agent types:
  • Standalone
  • JEE
  • Colocated
For more details on agents follow my below blog:

Admin role vs Developer role // Master vs work Repo:


Featured Post

11g to 12c OSB projects migration points

1. Export 11g OSB code and import in 12c Jdeveloper. Steps to import OSB project in Jdeveloper:   File⇾Import⇾Service Bus Resources⇾ Se...