Wednesday, October 11, 2023

OIC - DB polling and logical delete from oracle database in Oracle Integration

Usecase: Here, we will show you how to poll records from a database based on status field logical delete concept and if the record has non empty email id then, it will write them to a ftp directory, else update the record as ERROR in the database table.

Logic steps:
  1. Create a database connection as Oracle database or dbaas 
  2. Create a db table and insert records with status as NEW.
  3. Create an app driven orchestration integration and configure db polling where 
    1. Logical delete field = Status
    2. Read value= PROCESSED
    3. Unread value = NEW
    4. Rejected value =REJECTED
    5. POLLING Frequency = 30 sec
  4. Add a switch and check if the record has non empty email id and then write them to a ftp ditectory.
  5. Else configure db adpater invoke and update the status as ERROR and update date using current-dateTime() function.
Notes:
  • Support for processing message payloads up to 10 MB in size. In the case of polling, we must set the Rejected value property to REJECTED on the polling strategy and options page. If the incoming message is greater than 10 MB threshold size, that particular record is updated to REJECTED instead of read or new.
  • For each db record each instance will be created.

Create table query:

Create table SD_EMPLOYEE_Test(
ID NUMBER PRIMARY KEY,
FirstName VARCHAR2(200),
LastName VARCHAR2(200),
Department VARCHAR2(100),
Age NUMBER,
EmailAddress VARCHAR2(100),
Status VARCHAR2(10),
CreateDate Date,
UpdateDate Date
);

Detailed steps with screenshots:

Integration flow:


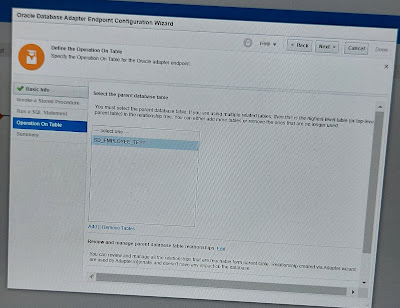
Configure db polling trigger


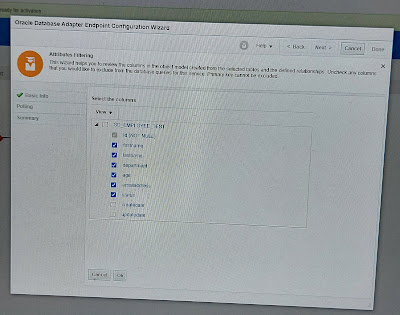
Edit > Review and verify table and relationship attributes


Edit > Review the polling strategy and specify polling options.


Add a switch and have below condition


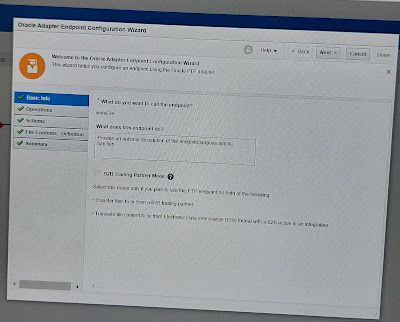
Configure write file FTP part


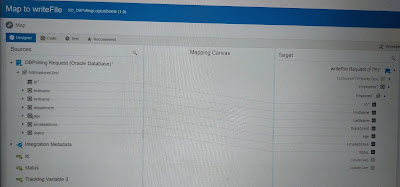
Map the polled record to ftp directory


In else case, configure update db status part.


Testing: 

6 records added with status as NEW


After activating the integration, we can see, 5 records processed and 1 in ERROR as no email id.


Below 5 files created for each eno empty email record :


Tuesday, October 10, 2023

OIC - Gen3 - Read file in segment - Set your own chunk size

In OIC Generation 2, we can also read file in segments or chunks using stage action but the chunk size is default limited to 200 records which we were not allowed to change.

In Generation 3 (23.04 onwards), it brings new feature that we can choose our own chunk or segment size from minimum 200 to maximum 2000 records.


Monday, October 9, 2023

Jdeveloper 12c - unable to launch the java virtual machine located at path: C:\\msvcr100.dll

Issue details: 

Sudden old java jdk version has been removed and new version jdk1.8.0_361 INSTALLED to my system. When I was trying to open the oracle jdeveloper 12c, its showing below error: 

Unable to launch the java virtual machine located at path: C:\Program Files \Java\jdk1.8.0_361\jre\bin\msvcr100.dll


Solution:

Step1: setup the java jdk path

Search with system enviroment variables in windows 10 

>> environmental variable 

>> edit user variable JAVA_HOME with jdk bin path like C:\Program Files \Java\jdk1.8.0_361\bin 

>> edit system variable path and add New as C:\Program Files \Java\jdk1.8.0_361\bin

>> ok >> ok >> ok

Step2:  Copy the msvcr100.dll file

From:

C:\Windows\System32

To:

C:\Program Files \Java\jdk1.8.0_361\jre\bin


These above 2 steps will resolve the issue.


Thursday, October 5, 2023

OIC - Create a Reusable integration to pass Request Payload into Database table as clob type

Usecase: Here, we will create a reusable component or integration which will take any data XML or Json or etc as binary data and simply save as Text to database table as clob type.

Follow my below blog how to save XML or Json file into stage and then save the request payload into Database table as clob type.

https://soalicious.blogspot.com/2023/10/oic-save-integration-request-payload.html

Logic flow:

  1. Create a database table with payload column as clob type.
  2. Create a rest trigger and database connection.
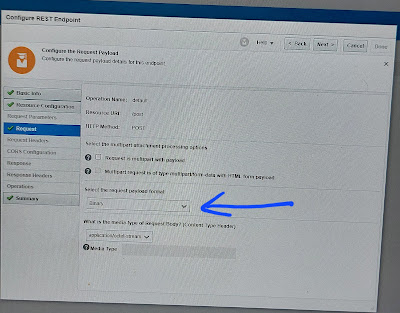
  3. Create an app driven integration and configure the rest trigget and request payload format as binary.
  4. Configure the database table to insert the payload.
  5. Map the binary request payload to database payload using  decodebase64(encodeReferenceToBase64(Stream Reference) functions (Basically we are converting the stream reference to base64 data and then decode the base64 data).

Table create:

CREATE TABLE OIC_TRACKING(

Id INTEGER PRIMARY KEY,

Payload CLOB,

Integration_Name VARCHAR2(100),

Integration_Identifier VARCHAR2(100));


Detailed steps with screenshots:

Integration flow:


Configure rest to pass binary data


Configure database to insert 


Map the stream ref to database table payload column.

Testing:


OIC - Save Integration request payload XML/JSON into database

Usecase: 

Here, We have a project requirement that we have to save the integration source data XML or Json into a database table so that the support person can track the payload if required. In addition, we need to save the metadata details like instance id, name, identifier etc.

Though Oracle integration allows us to track the complete complete using activity stream if debug or audit tracing is enabled. Saving the payload in the activity may have a security rick as the payload may contain sensitive data. 

But having a payload handy is essential for the operations or support team to debug the issues. Instead of storing the payload in the activity stream, we can save it into a persistent store like a database.

Note: here, we will save a Request Json data to database table, the same you can do using xml data.

Logic steps:

  1. Create a database table where payload column is as clob type.
  2. Create a database connection and a rest trigger connection.
  3. Create an appdriven integration and configure Rest to pass the json data as request paylaod.
  4. Write the request content into a stage location using the XML or JSON structure which ever required.
  5. Configure the database to insert
  6. Map the staged payload reference to database paylaod column using decodebase64(encodeReferenceToBase64(FileReference) functions.

Table create:

CREATE TABLE OIC_TRACKING(

Id INTEGER PRIMARY KEY,

Payload CLOB,

Integration_Name VARCHAR2(100),

Integration_Identifier VARCHAR2(100));


Detailed steps (with screenshots):

Integration flow:


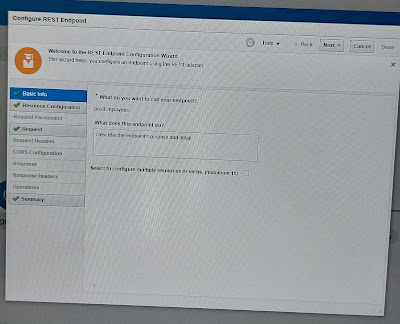
Configure rest trigger to send request


Assign some integration metadata specific details like instance id, name, identifier.


Write the JSON file into stage location


Configure the database to insert data


Map the stage payload to database payload column.


Test:


Monday, October 2, 2023

OIC - Gen3 - Connectivity agent basic authentication not supported | Support only OAuth 2.0 for Connectivity agent

New changes for connectivity agent:

  • While using connectivity agent, basic authentication is not supported in generation 3. 
  • To install and use connectivity agent, we need to use OAUTH 2.0 token based authentication in installerprofile.cfg file.
  • Create an agent group and download the config which will have all the details auto generated.
  •  Just then download the connectivity agent, unzip and replace the installerprofile.cfg file.

Navigation>> Go to Design >> agents


Download the agent


We can see client id and secret and scope added.


Download the config for the agent group to be used.


OIC - Split comma separated string values to Array | Use of create-nodeset-from-delimited-string() function in XSLT

UseCase: Here, we will show you how to split an input, received as comma separated string values( here, emails) into array of values using create-nodeset-from-delimited-string() function.

Logic steps:

  • Create a rest trigger connection
  • Create an app driven integration and configure using request and response jsons
  • Map the request to response using create-nodeset-from-delimited-string() function.

Input json:

{

"Emails":""

}

output json:

{

"Emails":[{

"Email":"",

},{

"Email":""

}]

}

XSLT code:

<nstrgmpr:executeResponse>

<nstrgdf1:response-wrapper>

<nstrgdf1:Emails>

<xsl:for-each select="oraext:create-nodeset-from-delimited-string('{http://test.com/sample/xml}value',/nstrgmpr:execute/nstrgdf1:request-wrapper/nstrgdf1:Emails,',')">

<nstrgdf1:Email>

<xsl:value-of select="."/>

</nstrgdf1:Email>

</xsl:for-each>

</nstrgdf1:Emails>

</nstrgdf1:response-wrapper>

</nstrgmpr:executeresponse>


Details steps with screenshots:


Rest configure to input comma separated strings and get back response as array.


Map the rest request which is the comma separated strings to array using create-nodeset-from-delimited-string() function.


Test:

Note: we can also use oraext:create-delimited-string() XSLT function to convert nodes to delimited string.

Reference:


Featured Post

11g to 12c OSB projects migration points

1. Export 11g OSB code and import in 12c Jdeveloper. Steps to import OSB project in Jdeveloper:   File⇾Import⇾Service Bus Resources⇾ Se...